LocalStack is an AWS service emulator that runs in a Docker container. With it, you can develop and test applications that use AWS without connecting to the real cloud, saving you costs and allowing you to work completely offline.
In this post, I’ll show you how to install and configure LocalStack in your homelab using Docker Compose, how to interact with the emulated services, and some practical examples.
⚠️ DISCLAIMER: Please note that this article is a manual translation of the Spanish version. The screenshots may have been originally taken in Spanish, and some words/names may not match completely. If you find any errors, please report them to the author. ⚠️
What is LocalStack?
LocalStack is a platform that emulates AWS services locally. It allows you to spin up a Docker container that exposes the same APIs as AWS, so you can interact with the usual tools (AWS CLI, SDKs, Terraform, etc.) pointing to localhost (or another host where you have LocalStack running) instead of the real AWS cloud.
Some of the services available in the free version are:
| Category | Services |
|---|---|
| Storage | S3 |
| Databases | DynamoDB |
| Messaging and Events | SQS, SNS, EventBridge |
| Serverless Compute | Lambda |
| API Management | API Gateway |
| Infrastructure and Monitoring | CloudFormation, CloudWatch |
| Security and Access | IAM, KMS, Secrets Manager, Security Token Service |
| Other Services | Kinesis, Step Functions, Route 53 |
To check the full list of supported services, visit: Licensing & Tiers | Docs.
⚠️ Important notice
In December 2025, LocalStack published the following on their blog: The Road Ahead for LocalStack: Upcoming Changes to the Delivery of Our AWS Cloud Emulators.
In that post, they announce that starting March 23, 2026, you’ll need a LocalStack Cloud account even to use the free tier.
I’ll refrain from commenting on this, but if you want to continue using LocalStack without an account, according to them, the only alternative will be to use the last version they publish before enforcing registration. This means that over time, the free version will become outdated and won’t have support for new services or updates.
When they implement the registration requirement, I’ll update this post with the necessary instructions to use the free version with and without an account.
Requirements
- Docker and Docker Compose installed. If you don’t have them yet, you can follow my Docker installation guide.
- (Optional) AWS CLI installed to interact with the emulated services.
Installation with Docker Compose
We start by creating the directory for our LocalStack project:
mkdir -p ~/Rootless-Docker-Files/localstack
Create the docker-compose.yml file:
cd ~/Rootless-Docker-Files/localstack

nano -cl docker-compose.yml
Add the following content, taken from the example in their repository with some minor modifications:
services:
  localstack:
    container_name: "${LOCALSTACK_DOCKER_NAME:-localstack-main}"
    image: localstack/localstack
    restart: unless-stopped
    ports:
      - "127.0.0.1:4566:4566"            # LocalStack Gateway
      - "127.0.0.1:4510-4559:4510-4559"  # external services port range
    environment:
      # LocalStack configuration: https://docs.localstack.cloud/references/configuration/
      - DEBUG=${DEBUG:-0}
    volumes:
      - "${LOCALSTACK_VOLUME_DIR:-./volume}:/var/lib/localstack"
#     - "/var/run/docker.sock:/var/run/docker.sock"
      - "/run/user/1000/docker.sock:/var/run/docker.sock"
⚠️ Note: Make sure the Docker socket path matches your system.
For root Docker installations, it will be at
/var/run/docker.sock. If that’s your case, uncomment that line and comment out the next one.For Docker Rootless, the socket is usually at
/run/user/$(id -u)/docker.sock. This is my case, so I’ve set the path with UID1000(my user’s).If you’re not sure, you can check the path by running:
echo $XDG_RUNTIME_DIR/docker.sockorecho $DOCKER_HOST.
If you want to run LocalStack on a different machine than the one you’ll use to interact with it (e.g., LocalStack on a VM and access it with AWS CLI from your machine), make sure to modify the ports section and remove the loopback address so that the ports are exposed on all network interfaces (be careful with this). Alternatively, you can set the IP of the network interface that is reachable from your client machine.
The simplest example, which exposes the ports on all interfaces, would be:
...
ports:
  - "4566:4566"            # LocalStack Gateway
  - "4510-4559:4510-4559"  # external services port range
...
For more information regarding the Docker ports, check Port publishing and mapping | Docker Docs.
Start the environment:
docker compose up -d
We can follow the logs with:
docker compose logs --follow
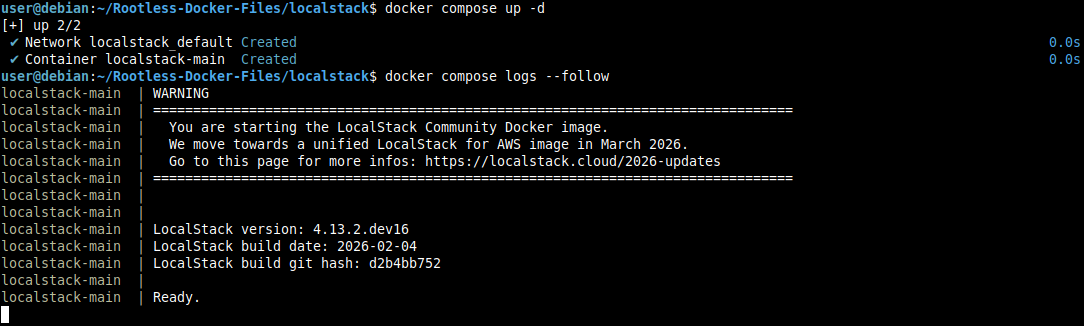
And in order to check that everything is working correctly, we can query the health status endpoint:
curl -s http://localhost:4566/_localstack/health | jq
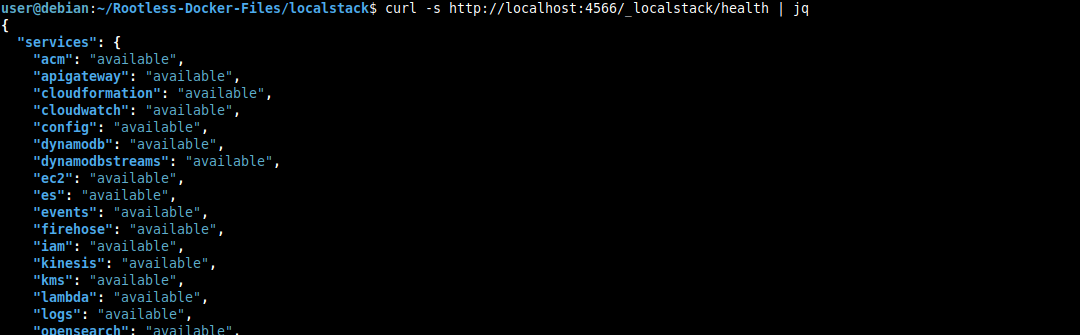
Obviously, you’ll need jq installed to format the JSON output.
Interacting with LocalStack
There are a couple of options, but in this post I’ll use AWS CLI. To install it, you can follow the official documentation.
Alternatively, you can use the awscli package if it exists in your distribution’s repositories, although it may be outdated.
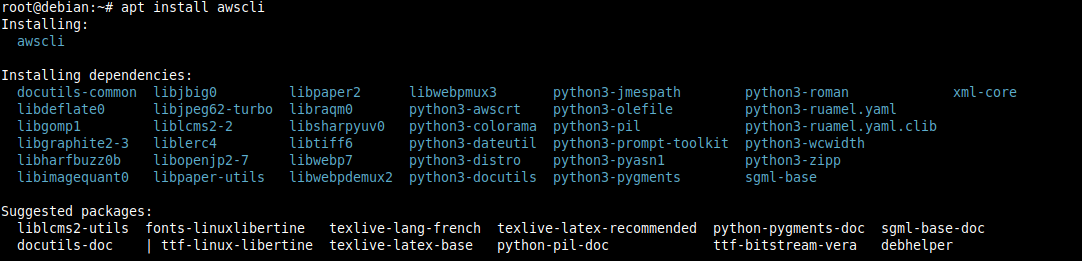
For Debian 13:
su -

apt install awscli

exit
Option 1: AWS CLI
You can use AWS CLI by exporting the test credentials as test:test, the region us-east-1, and adding the --endpoint-url parameter each time you run a command:
# Configure test credentials
export AWS_ACCESS_KEY_ID="test"
export AWS_SECRET_ACCESS_KEY="test"
export AWS_DEFAULT_REGION="us-east-1"

# Create an S3 bucket
aws --endpoint-url=http://localhost:4566 s3 mb s3://my-bucket

# List buckets
aws --endpoint-url=http://localhost:4566 s3 ls

# To delete the bucket
aws --endpoint-url=http://localhost:4566 s3 rb s3://my-bucket

We can see that when trying to create a bucket without having exported the environment variables, we get a credentials error, but after exporting them, the command runs successfully.
Now, I recommend creating a profile for LocalStack in your AWS configuration, so you won’t have to export the variables or add the --endpoint-url parameter every time.
Edit ~/.aws/config and add the following content:
mkdir -p ~/.aws

nano -cl ~/.aws/config
[profile localstack]
region = us-east-1
output = json
endpoint_url = http://localhost:4566
Edit ~/.aws/credentials:
nano -cl ~/.aws/credentials
[localstack]
aws_access_key_id = test
aws_secret_access_key = test
And to use the new profile:
aws s3 ls --profile localstack

Finally, to avoid specifying the profile every time, you can export it as an environment variable:
export AWS_PROFILE="localstack"

This export is not persistent, so if you want it to persist after restarting the terminal, add it to your ~/.bashrc, ~/.zshrc, or whichever you normally use:
echo 'export AWS_PROFILE="localstack"' >> ~/.bashrc
Option 2: awslocal
awslocal is an AWS CLI wrapper that automatically configures the endpoint. It’s more convenient for day-to-day use, but I don’t like installing additional tools if they’re not necessary.
If you’re interested in installing it, you can do so by following the official instructions.
Option 3: Whatever you want
LocalStack is compatible with any tool that can use a custom endpoint, so you can use Boto3, Terraform, etc. You’ll just need to configure the endpoint to point to your LocalStack instance.
Some practical examples
Working with S3
# Create bucket
aws s3 mb s3://example-data

# Upload file
aws s3 cp file.txt s3://example-data/

# Download file
aws s3 cp s3://example-data/file.txt ./downloaded.txt

# List contents
aws s3 ls s3://example-data/ --recursive

# Delete bucket even if it has content
aws s3 rb s3://example-data --force

Working with SQS
# Create queue
aws sqs create-queue --queue-name test-queue

# Send message
aws sqs send-message \
  --queue-url http://sqs.us-east-1.localhost.localstack.cloud:4566/000000000000/test-queue \
  --message-body "Test message"

# Receive message
aws sqs receive-message \
  --queue-url http://sqs.us-east-1.localhost.localstack.cloud:4566/000000000000/test-queue

# List queues
aws sqs list-queues

# Delete queue
aws sqs delete-queue --queue-url http://sqs.us-east-1.localhost.localstack.cloud:4566/000000000000/test-queue

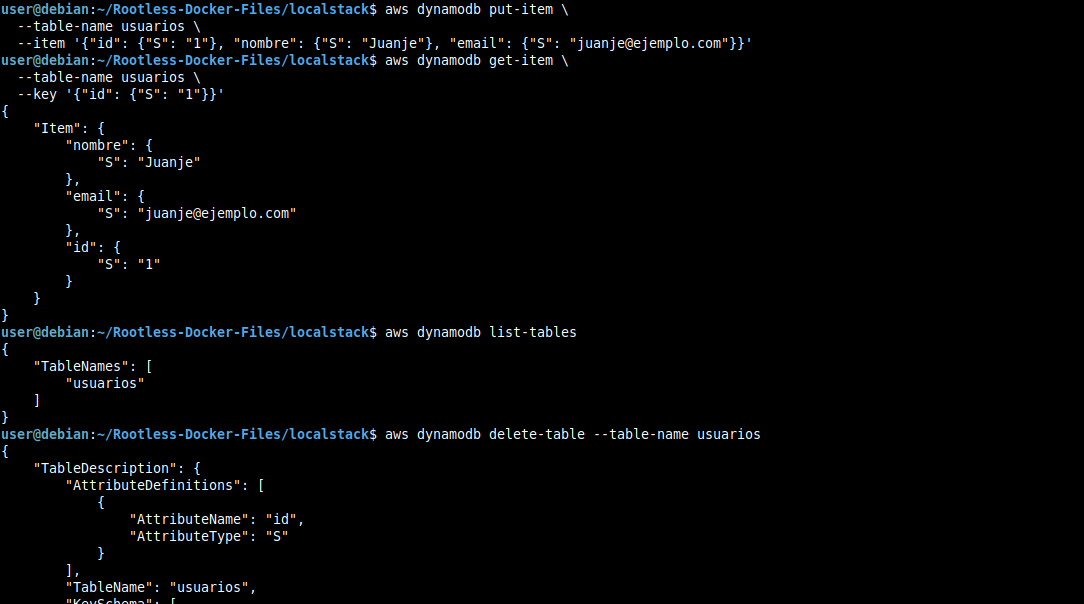
Working with DynamoDB
# Create table
aws dynamodb create-table \
  --table-name users \
  --attribute-definitions AttributeName=id,AttributeType=S \
  --key-schema AttributeName=id,KeyType=HASH \
  --billing-mode PAY_PER_REQUEST

# Insert item
aws dynamodb put-item \
  --table-name users \
  --item '{"id": {"S": "1"}, "name": {"S": "Juanje"}, "email": {"S": "juanje@example.com"}}'

# Query item
aws dynamodb get-item \
  --table-name users \
  --key '{"id": {"S": "1"}}'

# List tables
aws dynamodb list-tables

# Delete table
aws dynamodb delete-table --table-name users

Conclusion
LocalStack is a fantastic tool for anyone who wants to learn or already works with AWS. It allows you to develop and test without costs, without an Internet connection, and with the peace of mind that you won’t break anything in production.
It was very useful for me to get familiar with AWS and Terraform. You have nothing to lose by trying it, so I encourage you to install it and play around with it.
Don’t forget to check the official documentation to learn about all the configuration options and supported services.
Once you feel comfortable with LocalStack, the next logical step is to automate resource creation with Terraform. If you want to learn the fundamentals, I cover everything in my post about Terraform and infrastructure as code.