PeaNUT is a modern and elegant web interface that lets us visually monitor UPSs managed by Network UPS Tools (NUT). With PeaNUT, we can check the status of our UPS devices intuitively from any browser.
In this post, I’ll show you how to install and configure PeaNUT using Docker and Docker Compose.
⚠️ DISCLAIMER: Please note that this article is a manual translation of the Spanish version. The screenshots may have been originally taken in Spanish, and some words/names may not match completely. If you find any errors, please report them to the author. ⚠️
Requirements
- A server with NUT installed and configured. If you haven’t done so yet, check my post about NUT installation.
- Docker and Docker Compose installed on your system. You can follow this post about Docker.
Things to keep in mind
-
PeaNUT connects to the NUT server through port 3493 by default. Make sure your NUT server is configured in
netservermode and accepts network connections. Modify the port if needed. -
PeaNUT’s web interface is read-only. It doesn’t allow modifying UPS configurations, only viewing its status.
-
This post covers installation with Docker in rootless mode. If you use Docker in root mode, you’ll need to adjust the Docker socket paths.
What is PeaNUT?
PeaNUT is a lightweight and modern web interface for Network UPS Tools. It’s designed to be simple, fast, and easy to use, providing a clear view of your UPS status without complications.
Main features:
- Modern and responsive web interface
- Real-time UPS status visualization
- Detailed information about load, battery, and voltages
- Simple configuration through environment variables
- Compatible with multiple UPS devices
- Lightweight and efficient
Installing PeaNUT with Docker
Create directory structure
We start by creating the directory where we’ll host PeaNUT’s configuration files:
mkdir -p ~/Rootless-Docker-Files/peanut/config
If you use a different structure for your Docker projects, adjust the path according to your needs.
Create docker-compose.yml
We create the docker-compose.yml file for PeaNUT:
nano -cl ~/Rootless-Docker-Files/peanut/docker-compose.yml
Add the following content:
services:
  peanut:
    image: brandawg93/peanut:latest
    container_name: PeaNUT
    restart: unless-stopped
    volumes:
      - ./config:/config
    ports:
      - 3494:8080
    environment:
      - WEB_PORT=8080
Configuration explanation:
image: brandawg93/peanut:latest: Official PeaNUT image.container_name: PeaNUT: Container name.restart: unless-stopped: The container will restart automatically except if manually stopped.volumes: Mount a volume for persistent configuration. In this case, we’ll use theconfigdirectory we created earlier.ports: Map container port 8080 to host port 3494.environment: Environment variables, in this case the port where the container will serve the web internally.
Start the container
Start the scenario we defined in docker-compose.yml:
docker compose -f ~/Rootless-Docker-Files/peanut/docker-compose.yml up -d
Verify that the container is running:
docker compose -f ~/Rootless-Docker-Files/peanut/docker-compose.yml ps

First access to the web interface
At this point, PeaNUT should already be accessible at http://localhost:3494 or http://<SERVER_IP>:3494:
Initial PeaNUT configuration
When accessing PeaNUT for the first time, you’ll need to configure the connection to your NUT server.
You do this from the settings menu, which you can access by clicking the gear icon in the top right corner.
In the Manage servers section, enter the connection details for your NUT server:
- Name: A descriptive name for the server. It can be anything.
- Server: NUT server address (without including the port).
- Port: NUT server port (default
3493). - Username: If you followed the guide I published about NUT, enter
observerhere. - Password: The password you configured for the
observeruser (or whichever one you’re using).
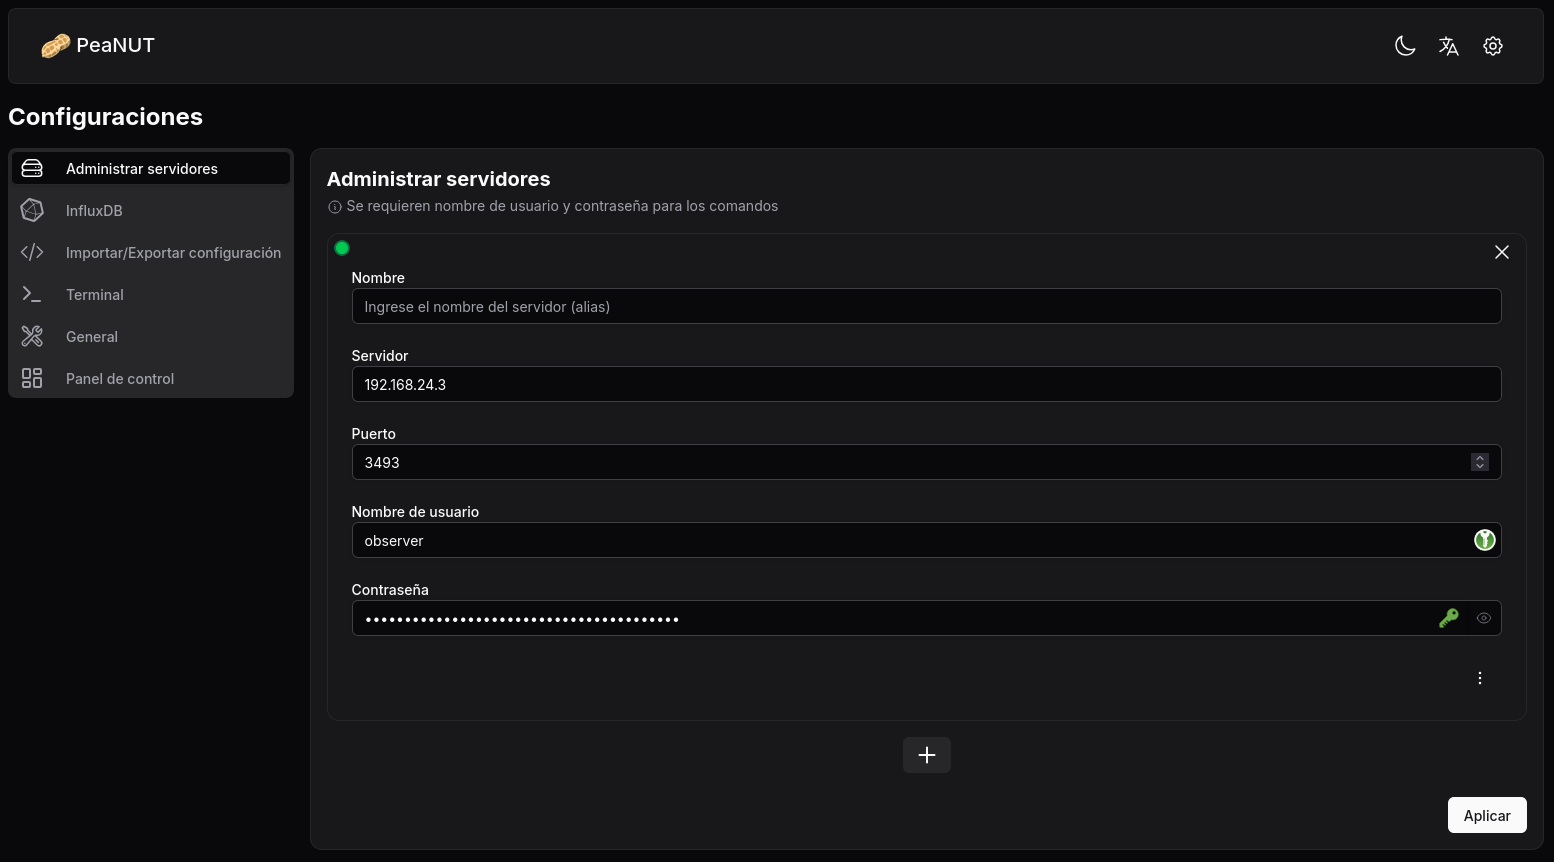
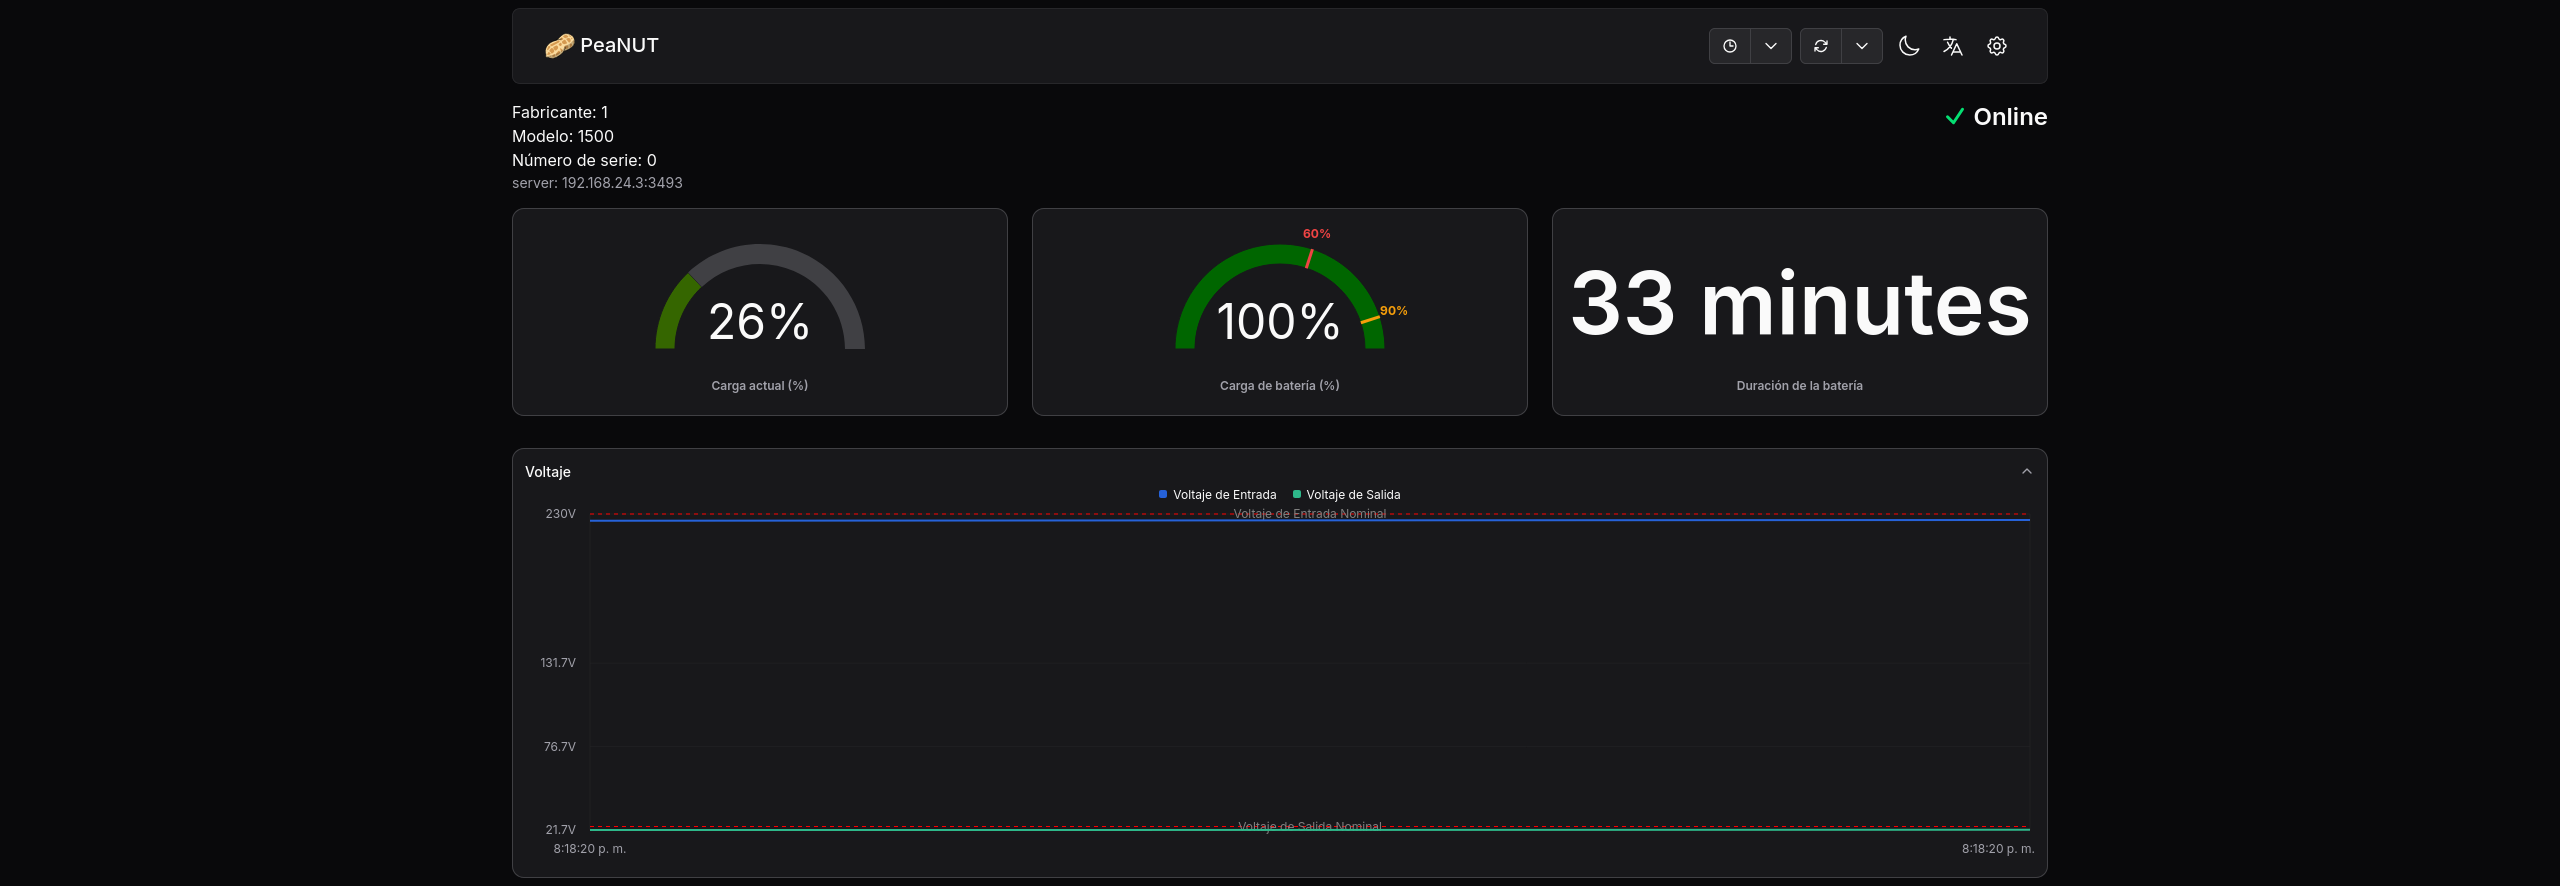
With these fields filled in, apply the changes and PeaNUT will start displaying UPS information in real-time:

Alternatives to PeaNUT
If PeaNUT doesn’t fit your needs or you want to explore other options, check out the NUT Web GUI project.
Conclusion
PeaNUT is an excellent option for visually and easily monitoring your UPSs managed by NUT. Its installation via Docker is quick and easy, and its interface makes it much easier to supervise our UPSs.
Don’t forget to check out the previous post, where I explain how to configure NUT and implement Telegram notifications to always stay informed about your UPS status:
Security
Some security recommendations:
- Keep PeaNUT accessible only from your local network (don’t expose it directly to the Internet).
- If you need remote access, use a VPN to connect to your local network.
- Keep Docker and images updated, paying attention to changes in new versions.